How to Implement Forms in SwiftUI - iOS Tutorial

In this iOS tutorial we are going to describe how to use forms in SwiftUI. Forms are a powerful tool, introduced with SwiftUI, enabling mobile developers to build various user forms quickly and efficiently, as opposed to the cumbersome legacy UIKit approach.
Many times while you are creating an app, you want to create some sort of a settings panel or a screen where users could enter various information. In UIKit, this meant using collection views or table views and writing a lot of the boiler plate code over and over again. With SwiftUI, however, you get the ability to create beautiful forms and settings panels using a container called “Forms”.
In this article we will create a simple order form in SwiftUI and we will discuss how the behavior of the elements change when you place them inside the Form container.
Let’s start! First launch Xcode and create a new SwiftUI project. Our order form shall have three textfields where the customer will enter name, email address and house address. Then there will be an image of the dish the customer wants to order, with its name, any extra options that the customer may wish to add and lastly a simple picker to increase or decrease the quantity. We will finish the order form with a simple “Order” button at the bottom.
Mega Bundle Sale is ON! Get ALL of our React Native codebases at 90% OFF discount 🔥
Get the Mega BundleStart by writing the Form container and inside include three TextField elements.
struct ContentView: View {
    @State var name: String = ""
    @State var address: String = ""
    @State var email: String = ""
    var body: some View {
        NavigationView {
            Form {
                Section(header: Text("Customer Information")) {
                    TextField("Customer Name", text: $name)
                    TextField("Email", text: $email)
                    TextField("Address", text: $address)
                }
            }.navigationBarTitle("Order")
        }
    }
}
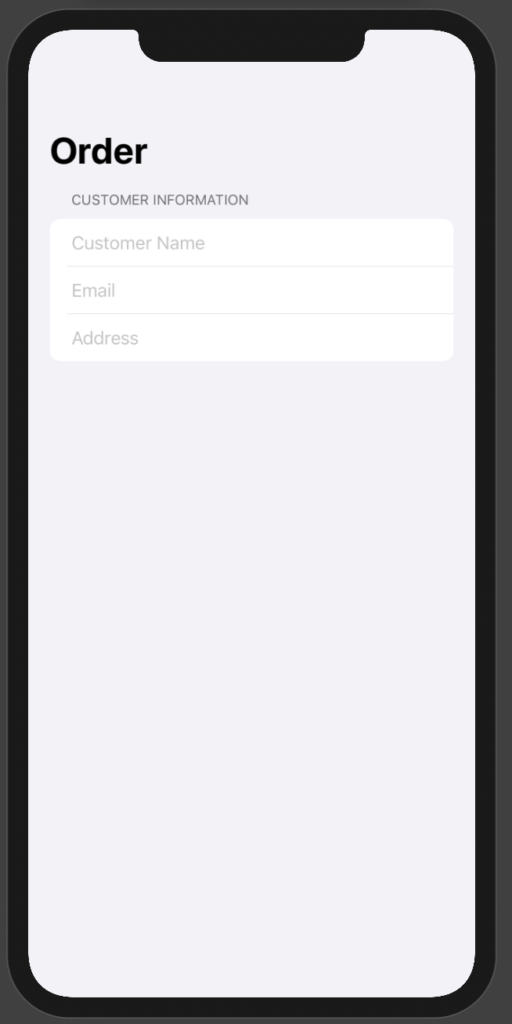
I have also wrapped the Form inside a Navigation View, so we will get a navigation bar that says “Order”. As you can see I have also used a Section. This will allow me to divide the Form into different sections and I can provide each section with a header and footer. The header and footer accepts a View, so you can place any custom view or a simple Text view as seen here. Inside this section, I have three TextFields each binder to a @State variable and containing a placeholder text.
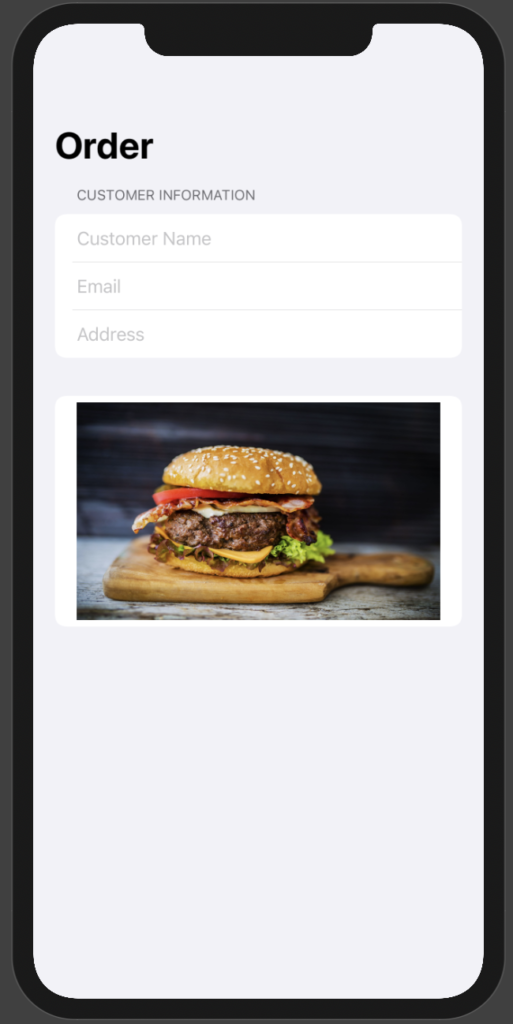
Next let’s add an image of the dish being ordered. To do this, we use Image(named: ) to add an image of a burger.
Form {
       Section(header: Text("Customer Information")) {
          TextField("Customer Name", text: $name)
          TextField("Email", text: $email)
          TextField("Address", text: $address)
        }

        Image("burger")
           .resizable()
           .frame(width: nil, height: 200)
           .scaledToFit()
 }.navigationBarTitle("Order")
The image is stored in the Assets folder of our project. In order to resize the image, make sure to use the resizable modifier first and then use the frame modifier to provide width and height.
Mega Bundle Sale is ON! Get ALL of our React Native codebases at 90% OFF discount 🔥
Get the Mega BundleThis is how our order form looks like till now.
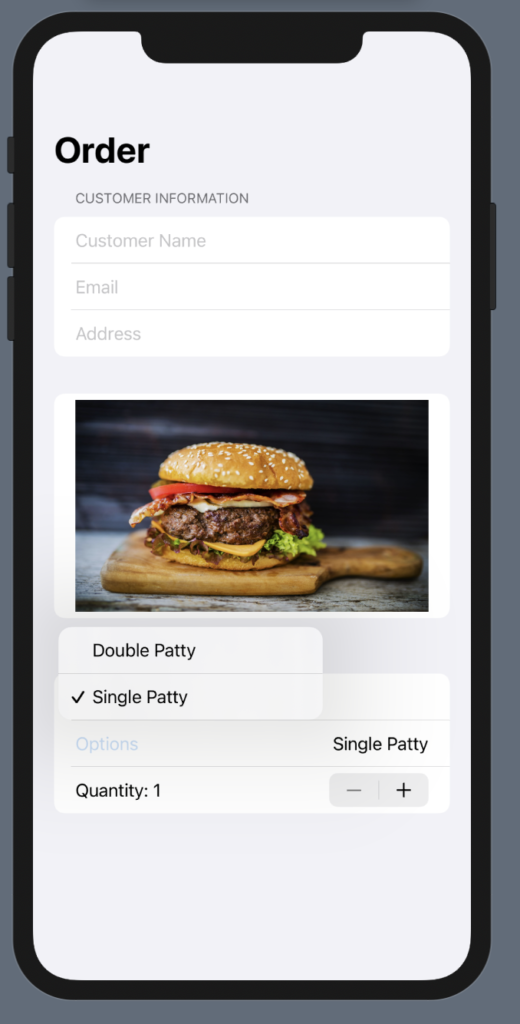
Now let’s add a new section for our Order preferences. Start by writing a new Section and providing it with a header text of “Order Information”. Inside this section we will add a Text view, a picker view and a stepper view.
@State var burgerOptionTag: Int = 0
@State var quantity: Int = 1
var burgerOption = ["Single Patty", "Double Patty"]
Section(header: Text("Order Information")) {
    Text("Beef Burger")
    HStack {
        Picker("Options", selection: $burgerOptionTag) {
            Text("Single Patty").tag(0)
            Text("Double Patty").tag(1)
        }
        .pickerStyle(MenuPickerStyle())
        Spacer()
        Text(burgerOption[burgerOptionTag])
    }
    Stepper(value: $quantity, in: 1...1000) {
        Text("Quantity: \(quantity)")
    }
}
In this Section, we have added a Text view that shows the name of the dish. After that we have a HStack that houses two elements, a Picker view and a Text view. Now before going any further, I would like to talk about some variables that we have initialized for this section. First being the burgerOptionTag this will be used to store which ever option the user has selected from the Picker view. Then we have a quantity variable that will be used as a binder with the Stepper view, and lastly we have an array of burger options to be shown in the picker.
The Picker view basically is binder to burgerOptionTag and inside we have listed two views, “Single Patty” and “Double Patty”. Each view has a tag assigned to it. We will use the new MenuPickerStyle which was released in iOS 14. This provides us with a menu to pick the options from.
Also inside this HStack, we have a Text view that shows the option that has been selected using the tag and the burgerOption array.
Next we have a Stepper view. This will help us in incrementing the quantity. Again this also requires a binder so we have a quantity variable bound to it. We can also give a range so that it doesn’t provide us with numbers below 1.
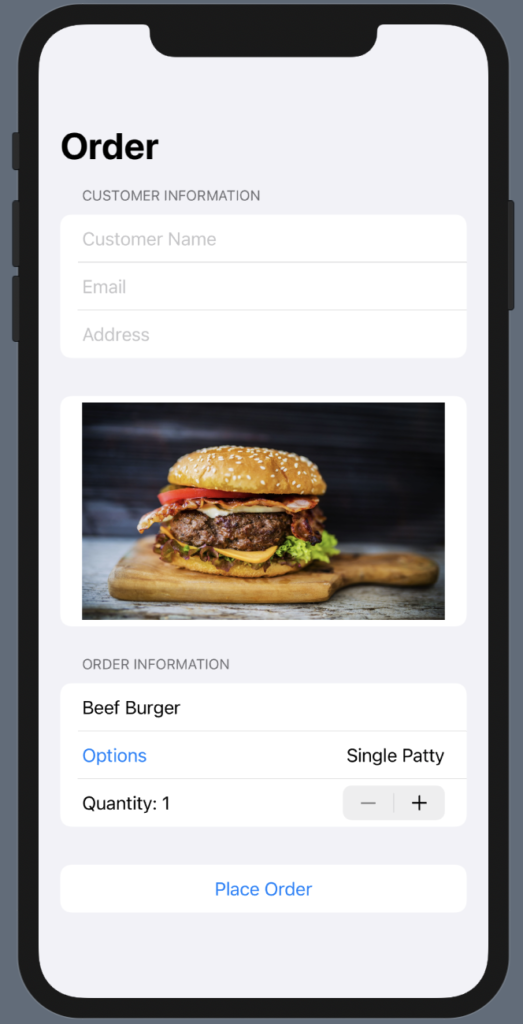
Lastly, we will add a button to finally order the dish. We will use the basic Button components provided to us by SwiftUI.
@State var orderStatus: Bool = false
Button(action: {
    self.orderStatus = true
}, label: {
    HStack {
        Spacer()
        Text(orderStatus ? "Ordered" : "Place Order")
        Spacer()
    }
}).disabled(orderStatus)
Here we have a boolean which we are making true when the button is pressed. When the button is pressed, the Text showing on the button is changed from “Place Order” to “Ordered” and the button is disabled.
Looking for a custom mobile application?
Our team of expert mobile developers can help you build a custom mobile app that meets your specific needs.
Get in TouchConclusion
This is how easy it is to create a simple order, sign up or settings screen in SwiftUI using Form. As you can notice, building forms in SwiftUI is extremely trivial nowadays, compared to the old legacy approach of UIKit, where developers had to leverage table views or collection views, with a lot of boilerplate code.