Update Server Key
Our Firebase backed iOS apps are using Google Cloud Messaging (within Firebase) to send push notifications.
Push notifications are enabled by default in all of our iOS templates. However, they are set up to work with our staging Firebase project, so you’ll need to switch to your own project, similar to how you’ve done it for Firestore.
Important! Push Notifications do not work on iOS simulators. You’ll need a physical iOS device to test them out.
Setting Up Push Notifications with Your Own Firebase
To set them up with your own Firebase, all you need to do is to replace the Server Key in the ATCPushNotificationSender class with your own.
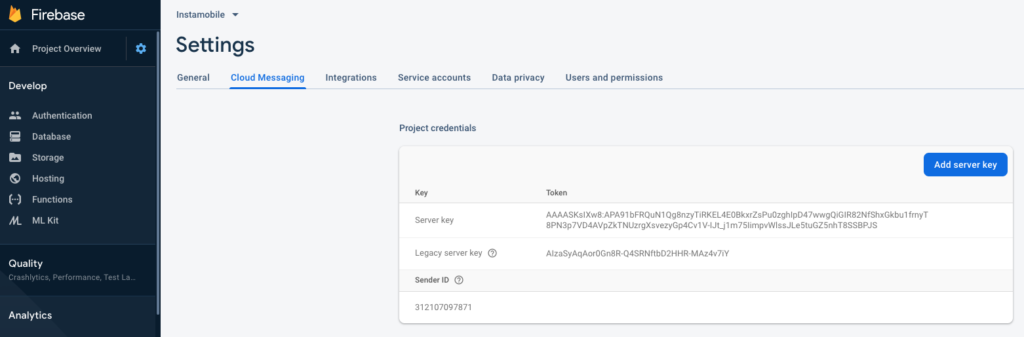
- In Firebase, go to Project Settings -> Cloud Messaging and copy the Server Key to clipboard
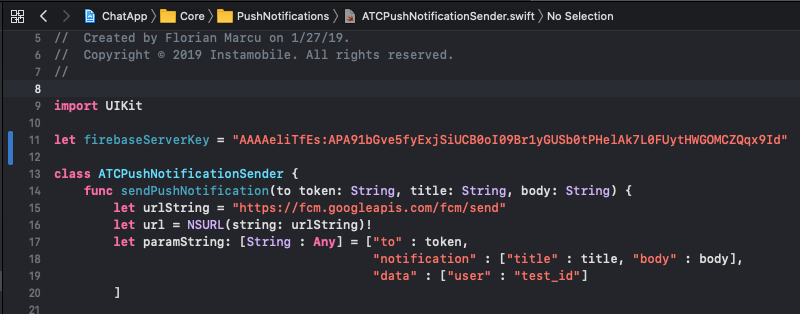
- In the source code, go to Core/PushNotifications/ATCPushNotificationSender****and replace the key (firebaseServerKey variable) with your own:
let firebaseServerKey = "YOUR_KEY_HERE";
Here’s an example of how the updated server key should look like:
That’s all you need to set up. Push notifications should now work properly (make sure you re-build and re-run your app after making this change).
Code Documentation
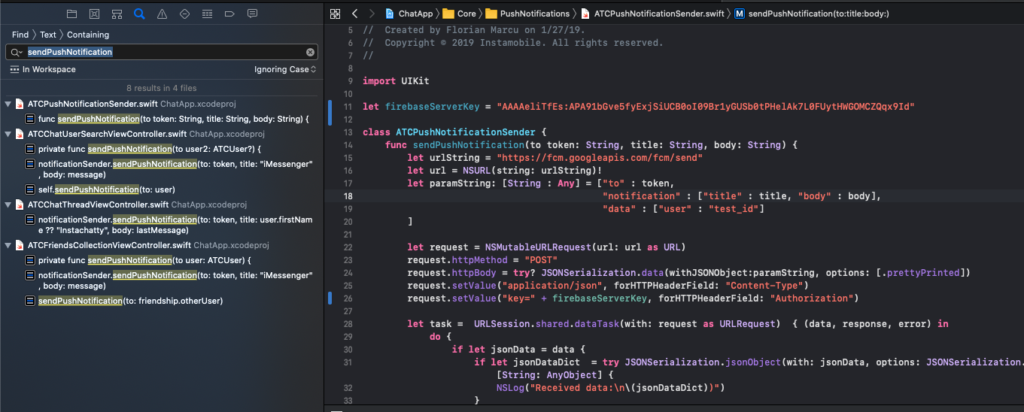
The main component that handles sending push notifications is ATCPushNotificationSender, which resides at Core/PushNotifications/ATCPushNotificationSender.swift. All notifications are being sent through the sendPushNotification method.
func sendPushNotification(to token: String, title: String, body: String)
To identify all the places that trigger push notifications, simply search for this method in the project.
After completing all these steps, including the ones in the previous section, push notifications will start working on iOS devices. Make sure you rebuild and rerun your apps after the changes.