Video Chat
Our audio & video calling functionality is based on WebRTC, which is a widely popular peer to peer communication protocol.
Enabling Push Kit & Call Kit
Push Kit enables your app to retrieve incoming calls when the app is in background, forced quit, or in locked screen.
Call Kit enables your app to display the native incoming call screen UI. This is particularly important when your app is not in foreground (so in background or locked screen), since it allows the call recipient to accept an incoming call.
To enable Push Kit in your app, you’ll need a server that makes the call requests to Apple’s Push Kit APNs. Fortunately, we’ve included this server code in the archive you’ve purchased. It comes as a Firebase function – check out the Firebase folder.
To enable Push Kit & Call Kit, simply follow the steps:
- Generate a .pem certificate with your Apple Developer account and the Bundle ID of your app. Find any online tutorial in case you didn’t do this before.
- Override voipCert.pem file with your own certificate.
- In Firebase/functions/pushKit.js, change two lines of code to update the correct password and the correct Bundle ID:
const config = {
    production: false, /* change this when in production */
    cert: 'voipCert.pem',
    key: 'voipCert.pem',
    passphrase: 'INSERT YOUR PASSWORD HERE'
 };
notification.topic ='io.instamobile.chat.swift.voip'; // change this to your own Bundle ID. You have to add the .voip suffix here!!!
- Deploy the Firebase function to your own Firebase, by running
firebase deploy
in the Firebase folder.
Now you will notice your function deployed properly in Firebase Console -> Functions. You can view the logs every time this method is called.
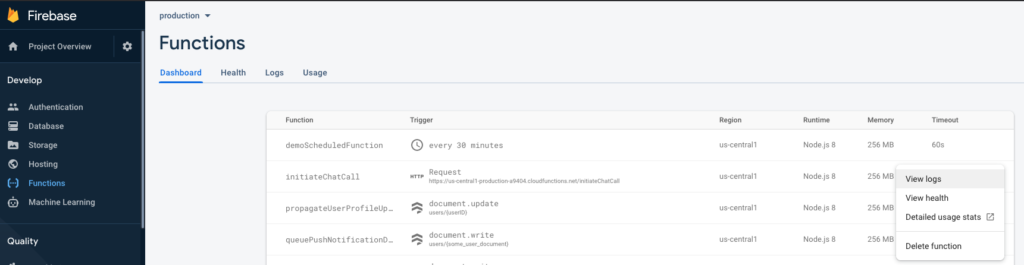
Go ahead and initiate a call between two users – you’ll notice this function will get called, and the recipient user will get a VoIP push notification call.
Debugging
If you don’t see any logs in Firebase, for the initiateChatCall function, this means the user that you call does not have a pushKitToken. This can happen for multiple reasons, such as they never opened the app, or they rejected the push notification permission dialog. To check whether the user has a push kit token, simply find that user in the “users” Firestore table, and see if their pushKitToken field is set up.
If you do see logs in Firebase – Successful logs look like this
{"sent":[{"device":"dae0721aef5713027f7efdbf2da5d3dec3cc0df3830facd2cccf1ef96122efa8"}],"failed":[]}
Since the “failed” field is empty, it means the request has been properly set up (correct certificate, correct bundle ID, correct password) so everything should work. Sometimes Apple APNs are a little flaky, especially when not in production, so be patient or try to initiate a call again.
Failed logs look like this:
{"sent":[],"failed":[{"device":"grgwrehe69eafe441a12e34a505620","error":{}}]}
In this case, you did not set the correct Bundle ID, the correct .pem certificate or the correct password. You’ll need to go over steps 1-4 again and figure out what you missed.