Setting Up Firebase Tables
1. Firestore Table Names
The name of the Firestore tables can be found in MultiVendorApp/MultiVendorServerConfig.swift class:
class MultiVendorServerConfig: ATCOnboardingServerConfigurationProtocol {
var isInstagramIntegrationEnabled: Bool = false
var appIdentifier: String = "multi-vendor-ios"
var isFirebaseAuthEnabled: Bool = true
var isFirebaseDatabaseEnabled: Bool = true
var firebaseVendorsTableName = "vendors"
var firebaseVendorCategoriesTableName = "restaurant_categories"
var firebaseVendorProductsTableName = "restaurant_foods"
var firebaseVendorOrdersTableName = "restaurant_orders"
var firebaseVendorFiltersTableName = "vendor_filters"
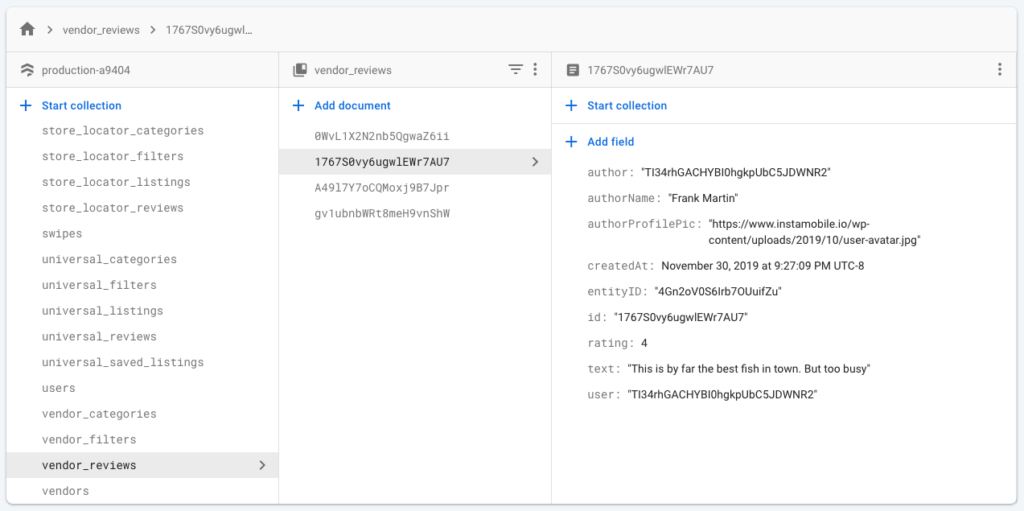
var firebaseVendorReviewsTableName = "vendor_reviews"
var reviewsEnabled: Bool = true
}
You can rename these tables as you wish.
There are tables that get populated automatically (orders, reviews) and tables that you need to populate upfront (vendors, categories and food items). Let’s see how we can populate the ones that are mandatory.
2. Table Structures
In order for the app to correctly display your data, you need to add your data into the correct Firebase tables, with precise field names.
Importing Our Data Seed Automatically
You can import all of our test restaurant data into your own Firebase automatically. This would save you a lot of time, since you don’t need to add each entity manually. You can edit the fields later, to add your own photos, names, locations, etc.
- Locate Data Seed files (there’s a DataSeed folder in the purchased archive)
- Clone this Github repo
- Place the four data seed files into the firestore-import-export folder
- Within the firestore-import-export folder, run the following three commands
node import.js vendor_filters.json
node import.js vendor_categories.json
node import.js vendors.json
node import.js vendors_products.json
That’s it. Now all the data is there, and your app should be usable.
In case you want to add your filters, categories and restaurants manually, you can follow the instructions below.
Here’s how all these fields look like:
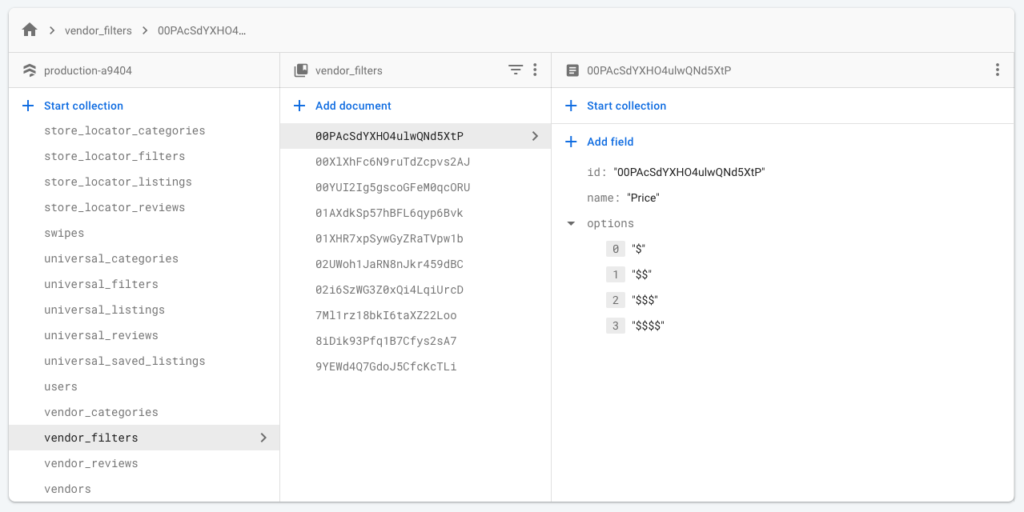
vendor_filters
Filters are characteristics of restaurants. They have a name, an id and a list of options. Each restaurant can have multiple filters, and to each (restaurant, filter) pair there’s only a single option.
For example, restaurant X can have two filters: one named “Price” with the value “$$”, and one named “Cuisine” with the value “French”.
So add all your filters first, by providing id, name and options fields:
vendor_categories
Restaurants are classified in categories, so let’s add your categories. These show up in different places in the app, such as:
- on home page, as the top stories-like tray
- on the categories screen
For each category, please specify id, title, photo (which is a valid URL), and order:
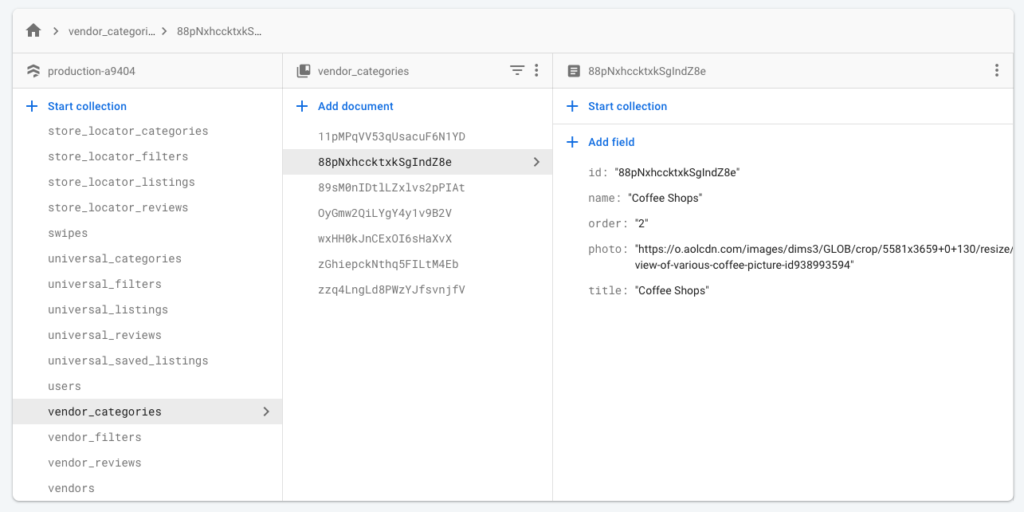
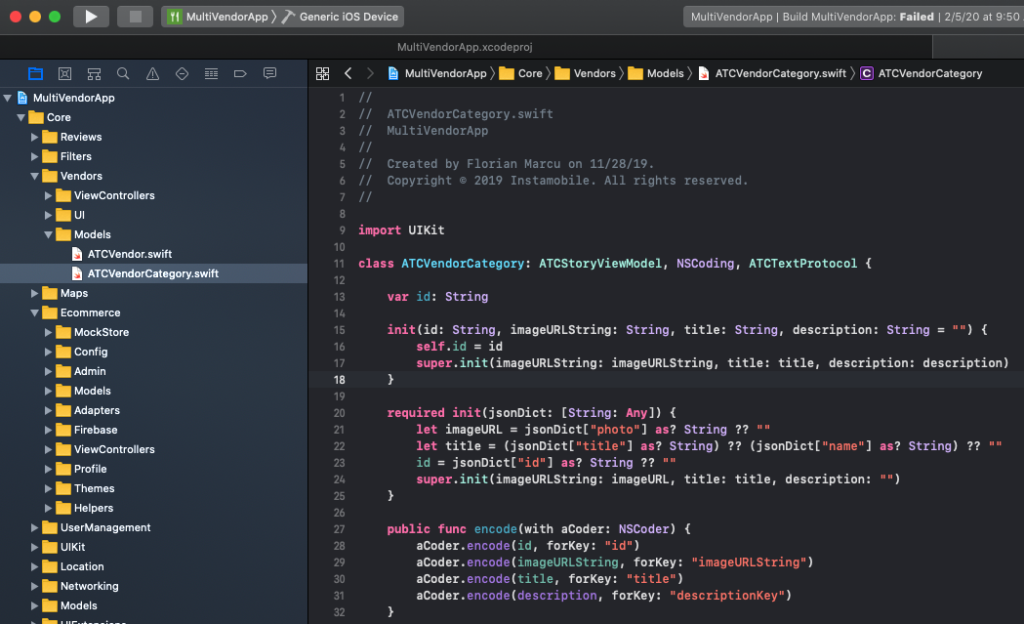
To rename or change these fields, you can find the mapping in code at Core/Vendors/Models/ATCVendorCategory.swift.
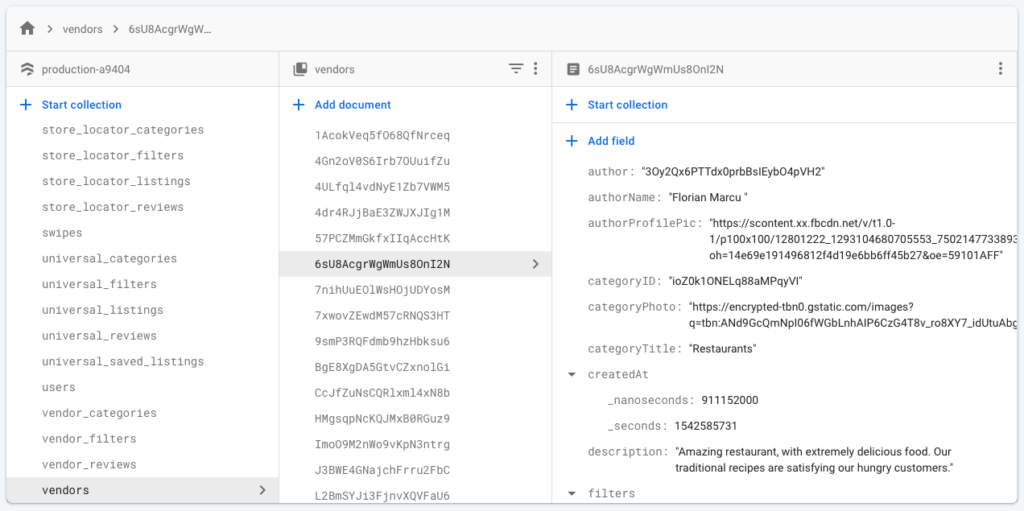
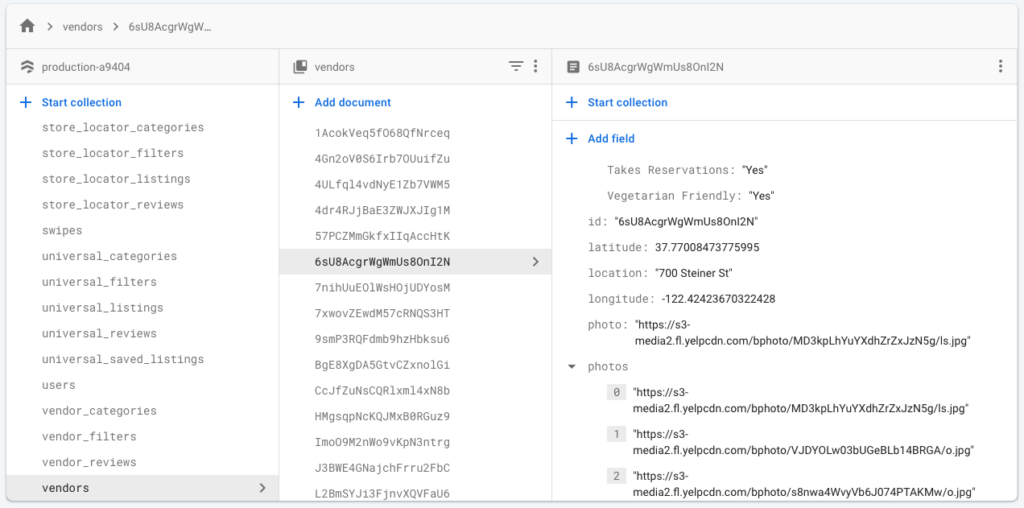
vendors
These are the restaurants, the coffee shops, etc. Now that we have filters and categories, we can create the vendors.
You can simply add just the mandatory fields, which you can locate in code at Core/Vendors/Models/ATCVendor.swift.
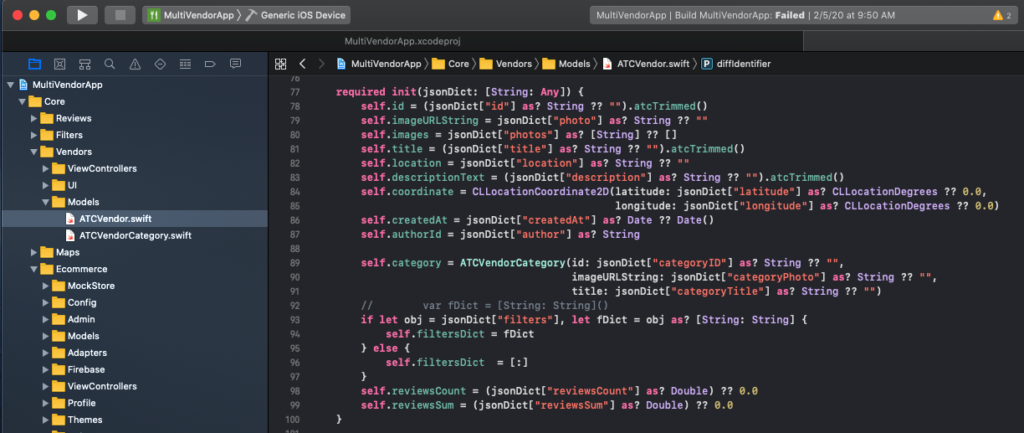
You need to specify: id, author (the user ID of the owner), categoryID, categoryPhoto, categoryTitle, photo, title, location, description, createdAt, latitude, longitude and filters.
- filters is a map, associating all filters of that vendor to their value (e.g. Price => $$, Cuisine => French)
- createdAt is a timestamp
- latitude and longitude are numbers
- everything else is a string

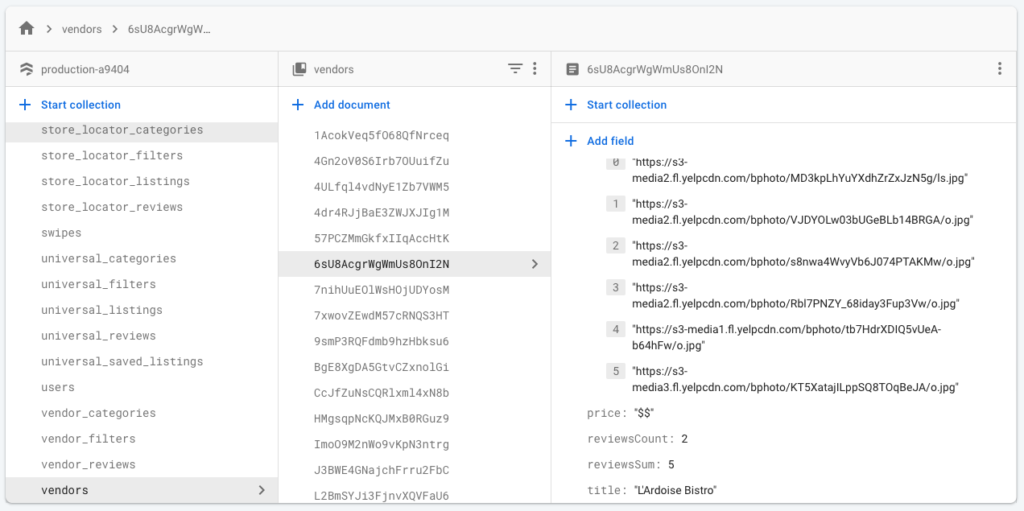
vendor_products
These are the food items that your customers can order from each restaurant. You need to create a different food item for each restaurant, since photos, descriptions and IDs are different.
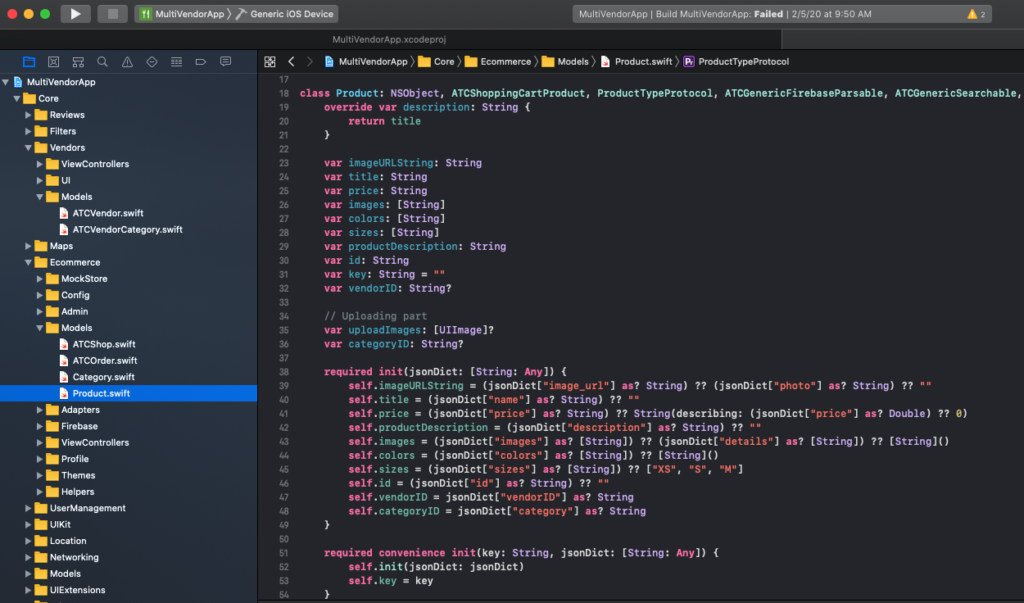
Specify the following fields: id, name, photo, price, description, details and vendorID.
- photos is an array of strings, containing the URLs to the photos (displayed in the photo gallery on single product screen)
- vendorID is the ID of the restaurant/vendor that sells this food item (it must match an ID from the vendors table)
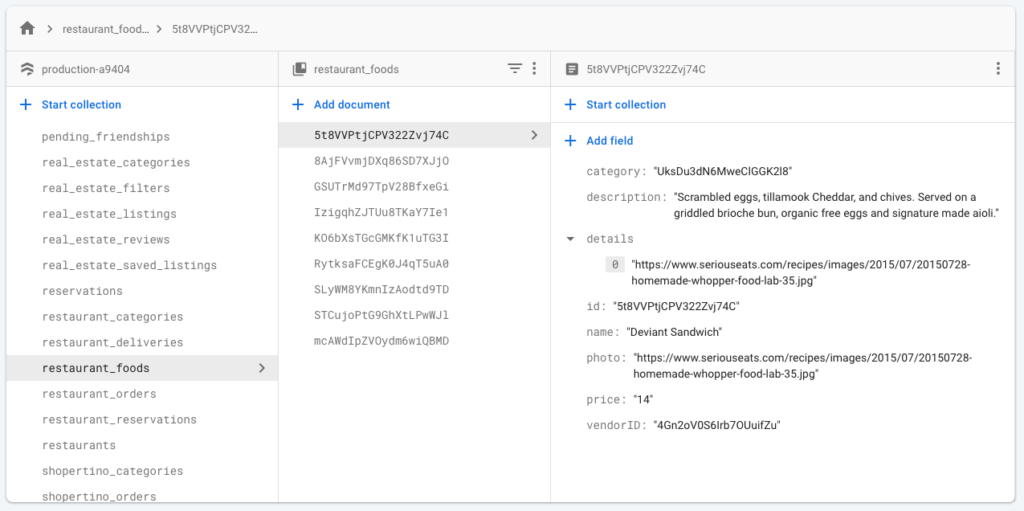
In the codebase, you can find the mapping of this table in Core/Ecommerce/Models/Product.swift
Once done, you’ll be able to see all of your categories, vendors and food items in the app. Add a few things to cart, edit your cart, try to edit your profile information, etc. to make sure everything works perfectly.