In this tutorial, we are listing all the steps you need to take to make your own food ordering app with our restaurant app template. There’s no coding required. We assume you’ve already downloaded our functional iOS Restaurant app.
On a high-level, there are 3 main steps you need to complete in order to make your own mobile app with the purchased app template. Complete the first two (click below) and then come back to this tutorial to finalize the setup.
1. Build & Run the restaurant app template in Xcode
2. Link the app to your own Firebase account
3. Add your own restaurant data (categories & menus) into Firebase
Now that you’ve completed the first two steps successfully, you need to add your own Restaurant data in Firebase, to display it in the app. Fortunately, this is very straightforward, since you only need to add two collections manually: categories & food items (products).
3.1 Head over to Firebase Console -> Database -> Cloud Firestore
3.2 Add your categories
Add a “categories” collection containing all the food categories your restaurant has. Make sure you specify all the required fields for each category: id, photo URL and name (e.g. “Entrees”). Here’s how the categories collection for our demo app looks like:
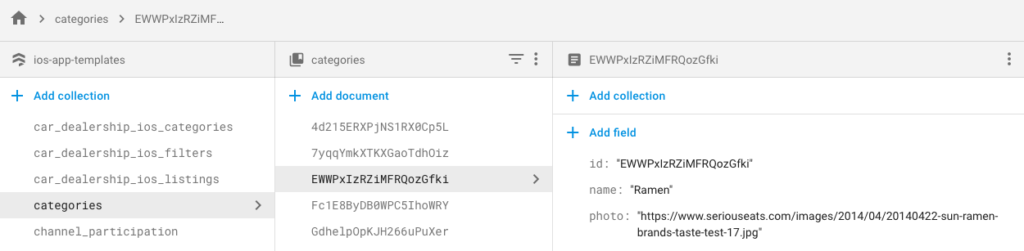
The order of categories matters, since they will be displayed in the app in that order. You can choose alphabetical ids, to make your job more simple.
3.3 Add your food items
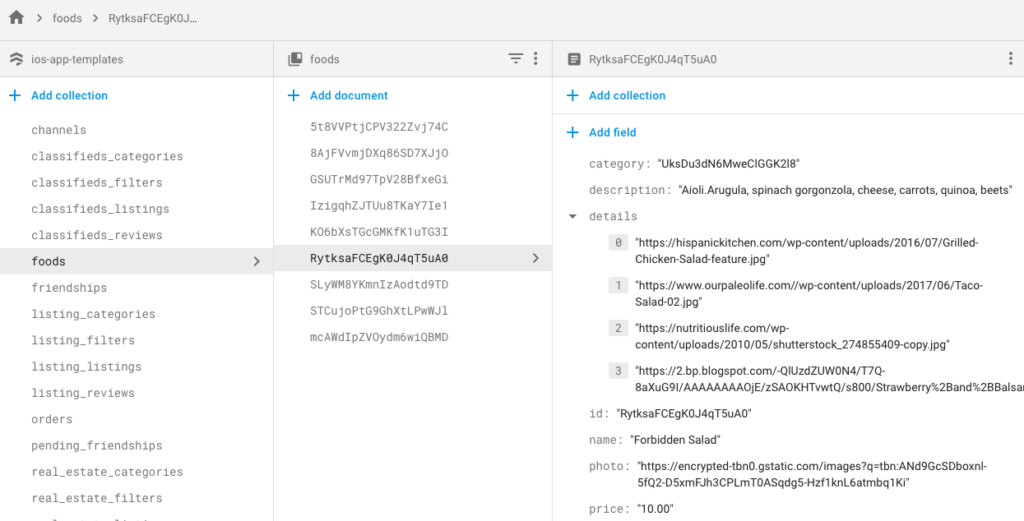
Now that you have several food categories, it’s time to add all of your food items into them. In Cloud Firestore database, add a new collection named “restaurant_foods”. In this collection, add all of the food items, by specifying all the required fields, such as:
- category – make sure this matches the ID of a valid category (added at the previous step)
- description – The description of the food item – it will be displayed on the food product details screen
- details – this should be an array of strings, containing a list of all the photo URLs you want to be associated with the current product. These photos will be displayed in the photo gallery on the food details screen
- id – this should match the document ID in the collection.
- name – the name of the food (e.g. “Chicken Salad”)
- photo – this is the cover photo of the food item that will show up everywhere (search, food menu, etc)
- price – a string with the exact price of the food item. It will be used for orders, check out, add to cart, etc.
That’s it. You can now run the app and it should display all categories & products you’ve added.
4. More Customizations
4.1. How to customize the onboarding screens
To change the content of the walkthrough, login, welcome and registration screens, locate RestaurantDataSourceProvider.swift file and change the texts, images, and colors as you want. Then run the app again in Xcode and observe the results. You can add/remove walkthrough screens, customize the existing ones, change the fonts and colors of the onboarding screens, etc.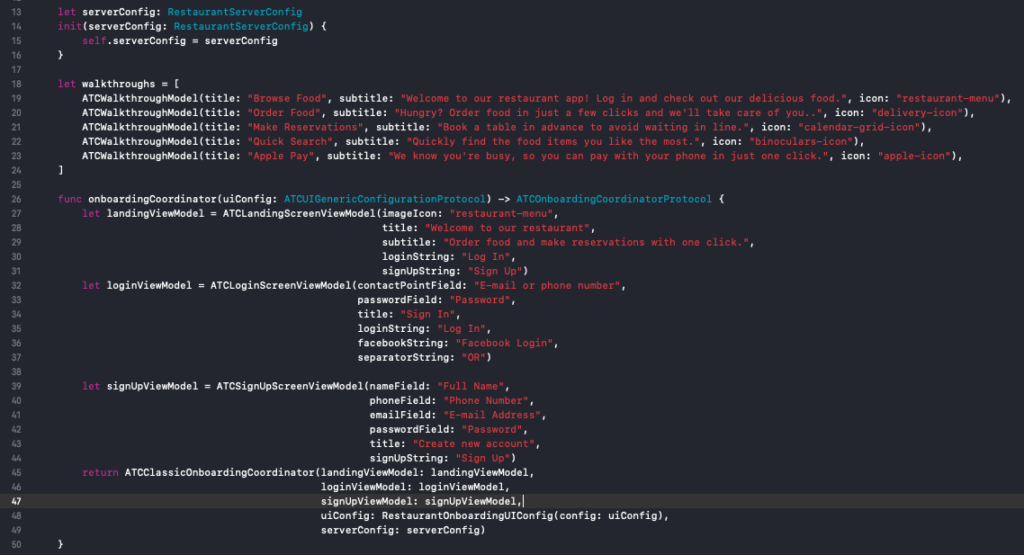
4.2. I don’t want to use Firebase, but a static list of categories and products
If you’re not interested in having dynamic data, you can turn off the Firebase integration by changing the isFirebaseAuthEnabled and isFirebaseDatabaseEnabled to false, in RestaurantServerConfig.swift file. You can also skip all the Firebase related installation steps.

If you do this, the app will start displaying the categories and products that are hardcoded in MockStore.swift file. Change the products and categories in that file to reflect your own restaurant and run the app again in Xcode to see the changes.

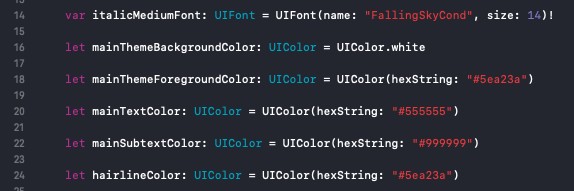
4.3. I want to change colors, fonts or icons
If you’re looking to change any UI elements, all you need to do is locate the UIConfiguration.swift file, in Core -> E-commerce -> Themes -> Simplicity and modify all the parameters that you want.
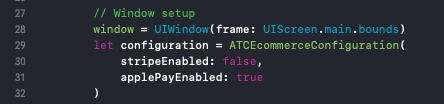
4.4. I want to disable Stripe, but enable Apple Pay
The payment method accepted by the mobile app is specified in the AppDelegate.swift file. Simply set stripeEnabled flag to false and applePayEnabled to true.
4.5. Link your own Stripe account
Obviously, you want your customers to send the payments to you and not our demo app. To achieve that, you need to link the app to your own Stripe account. Get your publishable API key from Stripe Dashboard and update it in the CheckoutViewController.swift file, which can be found in Core -> Stripe folder. There are more optional parameters you can configure, such as currency, Apple Pay Merchant ID, etc.

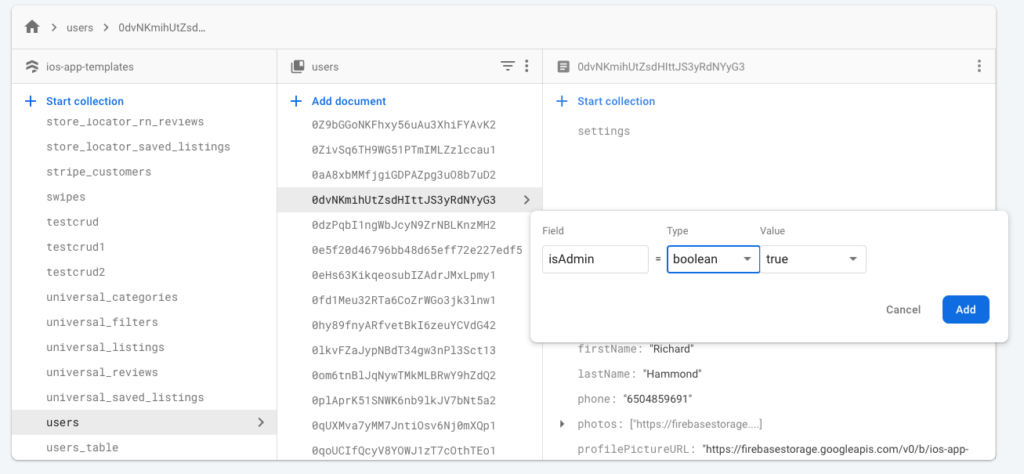
4.6. Enable Admin Dashboard
The Admin Dashboard menu will show up for all admin users. To make an admin, simply find the user in the “users” table in Firestore, and add a new boolean field to it called “isAdmin“. Set it to true.