Convert Your Shopify Store Into a Mobile App (iOS)
In order to convert your Shopify store into a mobile iOS app in Swift, use our Shopify iOS App Template. This guide describes the exact steps required to launch a native mobile app for any Shopify store.
High-level steps
- Run the app template in Xcode
- Link your Firebase account
- Link your Shopify store
- Set up Stripe for payments
- (Optional) Customize branding, colors, assets
- Submit to the App Store
1. Run the Shopify App Template in Xcode
Install CocoaPods, open the .xcworkspace in Xcode and run the project. For details see: https://www.iosapptemplates.com/xcode-projects-run-app-templates.
2. Link your Firebase account
The template uses Firebase for customer account management. Create a Firebase project and add the Google configuration file to the iOS project.
3. Link your Shopify store
You must generate a Storefront access token to let the app read your store data.
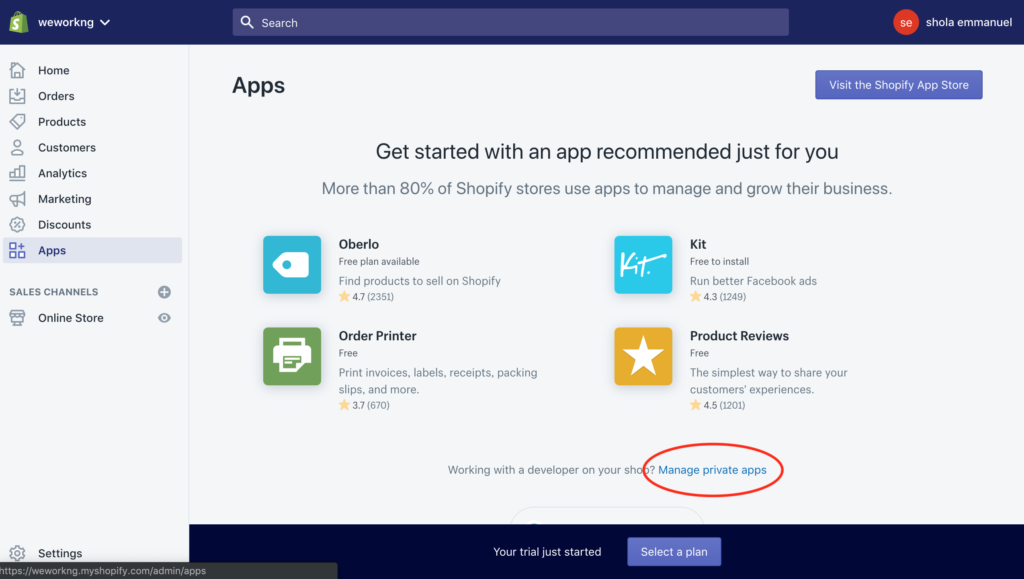
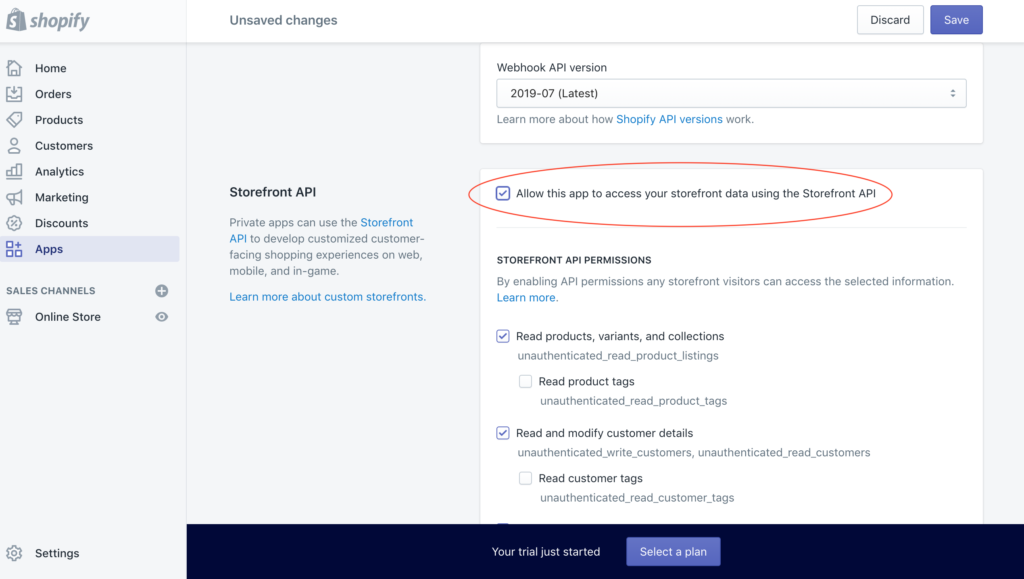
3.1 Generate a storefront access token
From your Shopify admin go to Apps → Manage private apps → Create a new private app and fill the form. In Admin API and Storefront API permissions select the data you want to expose and ensure storefront data access is allowed. Save and copy the generated Storefront access token.

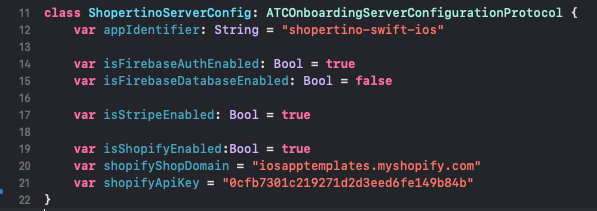
3.2 Update token & store URL in Xcode
Open ShopertinoServerConfig.swift and set shopifyAPIKey to the storefront token and shopifyShopDomain to your store URL.
Run the app again; it should display your Shopify collections and products.
If you need help, contact us and we’ll assist with shipping your Shopify app to the App Store.